As part of my role as technical sales specialist, I like to build labs to learn and experiment with different products, be they from VMware, Veeam, Nutanix, NetApp or any other vendor that I’m asked to work with. With that in mind, I run a home lab based on Dell PowerEdge T430 server. I was very lucky to acquire this system as it has 16 CPU cores, 48GB of RAM and some decent hard drives giving me approximately 3TB to play with. It runs vSphere 6.7. After much trial and error I decided I needed to build a virtual environment with multiple routed network segments that I could reuse whenever I needed depending on the technology I wanted to test. Here’s how I built my lab using vSphere virtual switches and an open source router package called VyOS.
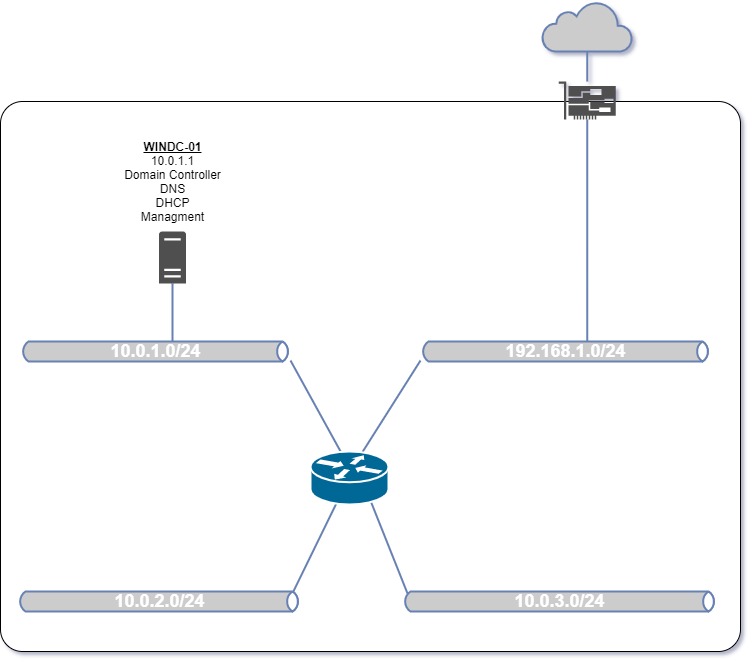
First of all, here’s an outline of what I’m trying to achieve. The server is attached via a single 1Gb NIC to my home network which has access to the internet via my ISP router. The NIC is configured as an uplink to the first vSwitch which will have a single port group for VM connectivity. I like to name my portgroups after the network segment that they will use, so this one will be called “192.168.1.0/24” to match the IP range used on my home network. This vSwitch will also have a vmkernel port for host management. Then I will create a second isolated (i.e. without direct uplink) vSwitch with a single port group called “10.0.1.0/24”. This port group will be for any utility VMs that I may wish to build, such as the Windows Domain Controller shown in the diagram. This is mainly for supplying services such as DHCP, DNS, file storage, etc. that the other test VMs may need.
2 more isolated vSwitches will then be needed for installing my test systems. So why 2 vSwitches? Well, quite often I’m trying to simulate environments where systems are replicating data between data centers and I want to test such things as site failover. Each of these vSwitches will have a single port group, as before, named to match the network segment it will use.
Finally, I’ll be using an open source router from VyOS to connect these network segments together, relay DHCP requests, and ensure DNS resolution works for both local systems and for services on the web.
So lets get started. The three pieces of software you’ll need are:
- vSphere 6.7 or later (the free vSphere Hypervisor version should be fine)
- VyOS router software (I used the latest rolling release – download it here)
- Windows Server 2019 (you can download an evaluation ISO image here)
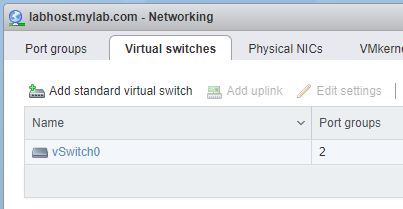
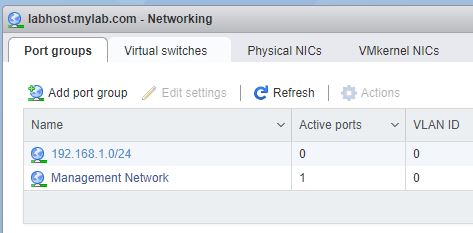
Assuming you have set up vSphere successfully, the first job will be to configure vSwitch0, the first default virtual switch. So we’ll need to go to the Networking section of the vSphere client. In my case there was a default port group called VM Network. As this didn’t suit my preferred naming standard, and renaming port groups appears to be no longer possible, I simply created a second portgroup with my preferred naming convention and deleted the default group, to end up with this:
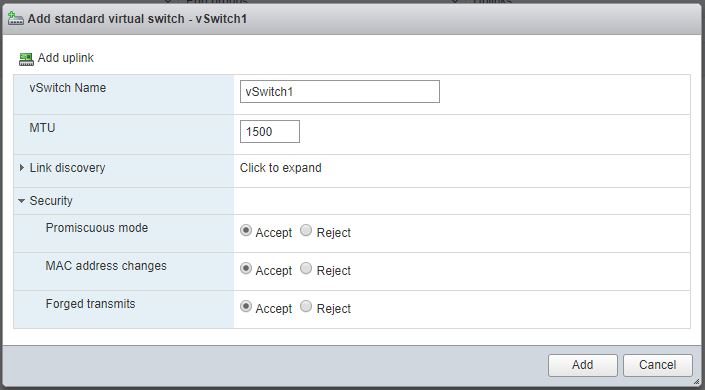
The second job is to edit the properties of the vSwitch so that all security settings are disabled, particularly Promiscuous Mode. I have found this to be necessary when running things like nested ESXi hosts, iSCSI virtual storage appliances, etc. So we’ll edit the properties of the vSwitch and set all security settings to Accept:

If you look at the properties of the port group on this vSwitch, you’ll see that the default is for the security settings to be inherited from the vSwitch, so no changes have to be made here:

Now we’ll need to go back to the Networking. Go to the Virtual switches tab and click on Add standard virtual switch:
We’ll call this one vSwitch1. Make sure any uplinks that have been automatically assigned are removed and set all the security options to Accept. Click Add:
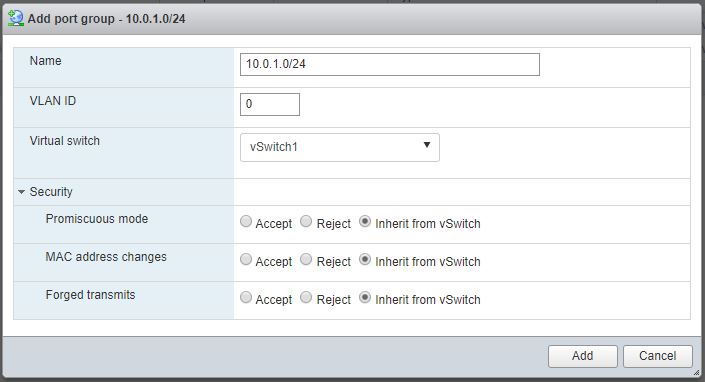
Now go back to the Networking. Go to the Port groups tab and click on Add port group:
Name the new port group according to our namin convention. Ensure that the port group is assigned to vSwitch1. Note the security settings are once again inherited from the vSwitch. Click Add:
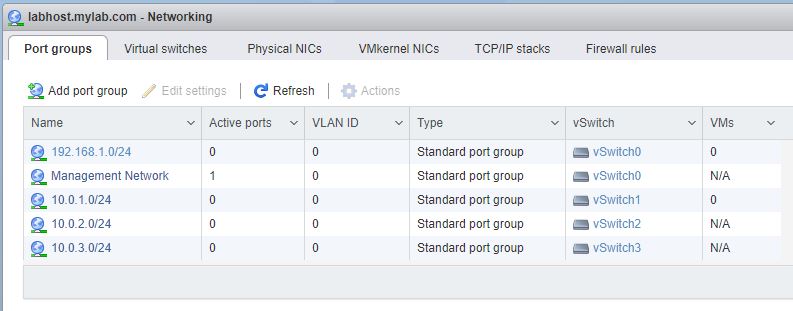
Now we just need to repeat that process twice more times to create 2 more vWitches and 2 more port groups. And this is what we should see in the Virtual switches tab (note the number of port groups and uplinks associated with each vSwitch):

And here’s what we should see on the Port groups tab:
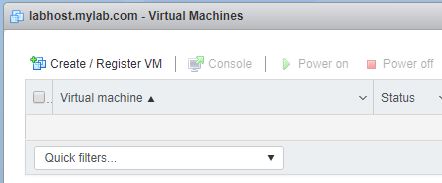
So now we’ll need to connect these 4 networks together using a router. At this stage you should have downloaded the VyOS install image and uploaded it to a datastore on the vSphere host. First, go to the Virtual machines section in the vSphere client and click on Create / Register VM:
Highlight the option to Create a new virtual machine and click Next:

Give the VM a meaningful name and set the Guest OS family and version to Linux, Other Linux (64-bit) as shown. Click Next:

Create a VM with 1 vCPU, 512MB of memory and a 2GB hard disk as shown. Also, click on Add network adapter 3 times. This will ensure that the VM is cretaed with four E1000 adapters, one to connect to each port group:
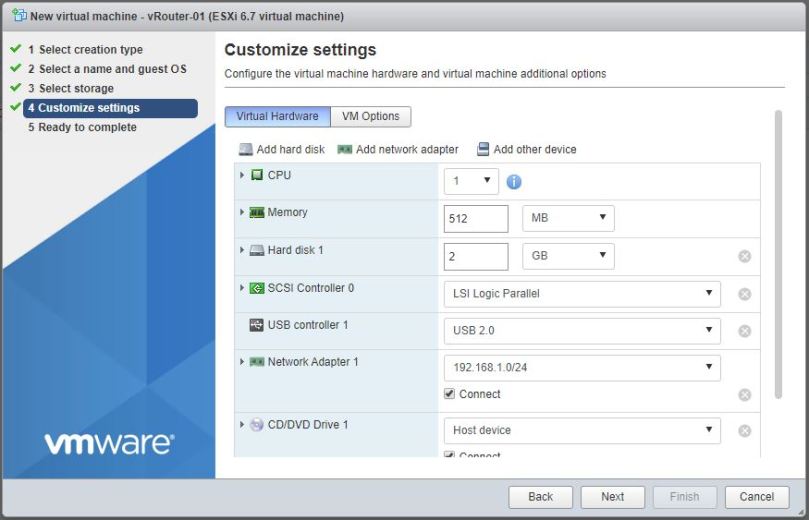
Scroll down to the network adapters and make sure that there is on connected to each of the four port groups as shown. It is important to note however that we are later going to have to match up these assignments with the MAC addresses assigned to the virtual NICs so we will be revisiting this later to make some adjustments:

Scroll down and configure the CD/DVD drive so that it is connected to the VyOS installation media. Click Next:

Review the settings for the new VM and click Finish:

When the new VM has been created, edit its settings and make sure that the adapter/portgroup pairings are as shown below. If not you can use the drop-down boxes to make any changes necessary. When you’re done, click Save:

Now we can power on the VM and open a virtual machine console. All going well, you should first see this boot screen:
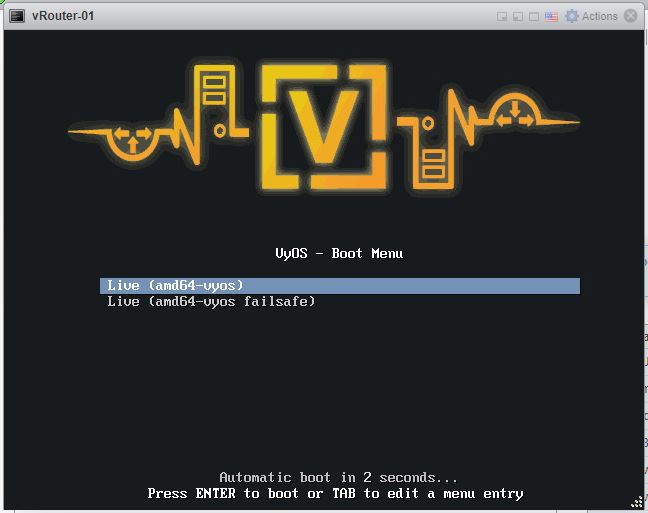
Login as user vyos, password vyos:

To start the install type install image. Hit Enter to continue:

Hit Enter to accept automatic partitioning of the hard disk:

The system will be probed for available disk drives and should find just one which it will label sda. Hit Enter to install the image on this disk:

Type Yes and hit Enter to accept that all data will be destroyed as part of the install process:

Hit Enter to accept the maximum root partition size:

Once the root file system has been created, you can hit Enter to accept the suggested image name:

Hit Enter to accept the suggested config.boot file:

Now enter a new password for the vyos user. Make sure it’s something you can remember easily:

Hit Enter to install the GRUB boot loader on sda:

And now the install is done!

The final step before we start configuring the router is to reboot it. Simply type reboot and hit Enter. Type y and hit Enter to confirm the reboot:

When the router has finished rebooting, log back in as user vyos and using the new password. The first thing we’ll want to do is identify all the NICs and make sure they are connected to the right port groups. To do this first type conf to enter configuration mode and then type show:

Looking at the interfaces section of the configuration file you can see how each name (eth0, eth1, etc) matches up to a MAC address:

If we now go to the vSphere client and have a look at the hardware properties of the router VM, we can see how the MAC addresses in turn map to a connected network (or port group). So based on these two views we can establish the following mappings:
eth0 -> 192.168.1.0/24
eth1 -> 10.0.1.0/24
eth2 -> 10.0.2.0/24
eth3 -> 10.0.3.0/24
If you don’t see the expected mappings, you may need to edit the router VM properties to reassign the vNICs.

Now we can start configuring the VyOS to start routing traffic the way we want. Still in configuration mode, the first step is to assign IP addresses to each of the four interfaces. The commands to do this are as follows:
vyos@vyos# set interfaces ethernet eth0 address 192.168.1.250/24
vyos@vyos# set interfaces ethernet eth1 address 10.0.1.0/24
vyos@vyos# set interfaces ethernet eth2 address 10.0.2.0/24
vyos@vyos# set interfaces ethernet eth3 address 10.0.3.0/24
Now we’ll create a source NAT rule for any traffic that needs to go through my home router onto the internet:
vyos@vyos# set nat source rule 10 outbound-interface eth0
vyos@vyos# set nat source rule 10 translation address masquerade
Then we’ll create a static route that tells the router where to send any traffic that isn’t destined for one of the four networks above, i.e. internet traffic. This is the equivalent of setting a default gateway for the router. We set the next hop as the internal IP address of the home router:
vyos@vyos# set protocols static route 0.0.0.0/0 next-hop 192.168.1.254
At this stage we’ll enable the ssh service so we can use SSH clients, such as PuTTY, in the future:
vyos@vyos# set service ssh port 22

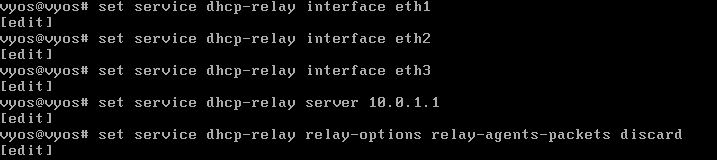
Now I want to make sure that any systems relying on DHCP can find the Windows Server 2019 system that will act as my DHCP server. I do this by entering the following commands:
vyos@vyos# set service dhcp-relay interface eth1
vyos@vyos# set service dhcp-relay interface eth2
vyos@vyos# set service dhcp-relay interface eth3
vyos@vyos# set service dhcp-relay relay-options relay-agents-packets discard
Notice there is no entry above for eth0. That’s because eth0 is attached to my home network and I don’t want any systems out there requesting IP addresses from my lab DHCP server. These are distributed by my home router.
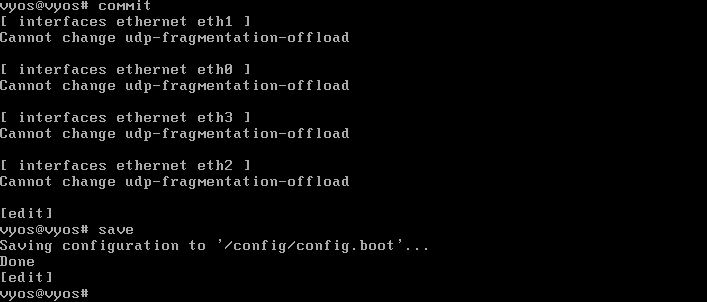
Now it’s time to save our work. Do this by first entering the command commit followed by the command save:
That should be it for the router. Now we’ll need to test it. The way I do that is to create a few DHCP scopes, one for each network segment, and then see if a VM attached to each network will get a lease. In the screenshot below you can see that I’ve create 3 scopes. Each one has an address pool of 10.0.x.100 – 10.0.x.150 and has scope options for distributing a default gateway address (the IP address of the router interface attached to that network), a DNS server address (the address of the domain controller) and a domain name:

Now you can build a test vm and attach it to each network segment in turn by editing the VM settings and changing it to each network. If you can do an ipconfig /all and see that the VM has leased an address from the right pool and successfully ping a well known DNS address like http://www.google.com, then you know everything works as it should.
Now you can get on with building whatever lab you need. And remember this setup is as extensible as you want it to be. Need more network segments, just create more vSwitches and port groups and build a VyOS router with more interfaces!
Until next time…
