(Note: Since writing up this post and its follow-up on upgrading the mhVTL appliance, I have run into issues getting the current mhVTL code to work with Veeam v9. As a result I have switched to using an alternative solution, QuadStor VTL, in my lab. Please go here to read my new series on how to integrate QuadStor VTL with Veeam.)
Update: Be sure to check out KB2094 before proceeding with mhVTL.
Have you ever wanted to test the backup to tape functionality in Veeam Backup and Replication in your lab but not been able to because of lack of physical kit? Recently I went digging for a solution and found mhVTL, an open source effort that seems to be driven largely by Mark Harvey, a technical support engineer in Symantec, now Veritas. I’ve been using it to simulate a 2 drive Dell PowerVault iSCSI tape library and I’ve found it really useful, allowing me to test all sorts of scenarios that I simply would not have been able to consider otherwise.
The main mhVTL website is at https://sites.google.com/site/linuxvtl2/. Here you can download the RPMs if you feel like building your own virtual appliance for scratch. Me being a bit lazy however, I went looking for a prebuilt appliance that I could use in my vSphere environment and found one at http://www.sightunseen.org/files/mhvtl.zip. This appliance is based on Ubuntu and uses version 1.4.7 of the mhVTL binaries, which is a slightly older version than the current release but it still works well and you should have it up an running in no time. The appliance supports a range of emulated tape libraries including models by StorageTek, Spectra Logic, Sony, IBM, Quantum, Dell, HP, ADIC and Overland and for each model you can specify the number and type of drives, the numbeer of full and empty slots, the capacity of the media, etc. For my purposes I found that the Dell PV-136T emulation worked best and was instantly picked up and recognised correctly by my Windows 2012 backup server.
Note that the device works as an iSCSI SAN-attached device so some familiarity with iSCSI targets and initiators is helpful.
Also, familiarity with the basic Linux vi commands is necessary.
After you download and unzip the file, you’ll see that it comprises an OVF bundle with 2 VMDK files, one for the operating system and mhVTL binaries and one for the tape repository.
As a prerequisite (although it’s not strictly required) I’ve created forward and reverse DNS entries for my appliance.
The screenshots show the deployment of the OVF using the traditional vSphere client here, but you will probably want to use the vSphere Web Client.
First, I start the “Deploy OVF Template” wizard and browse to the unzipped mhvtl.ovf file:

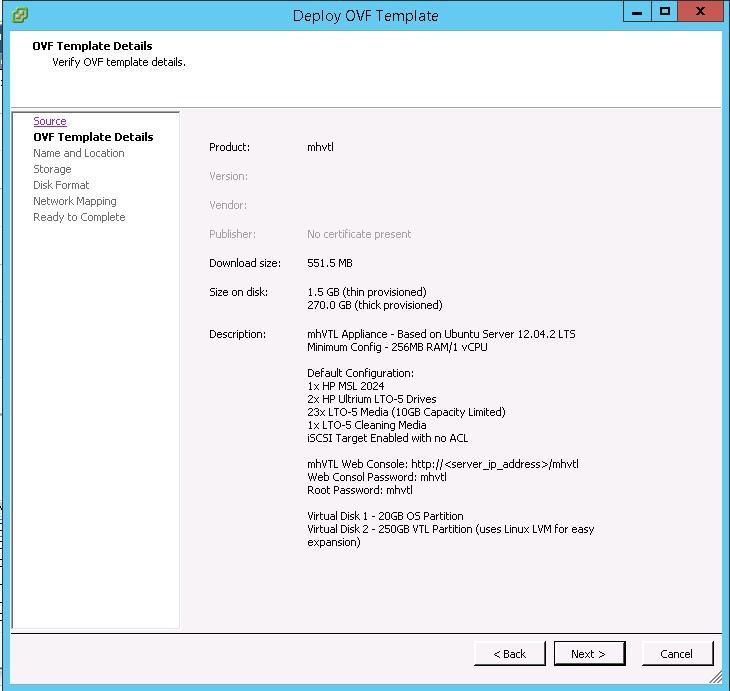
Click next to view the OVF Template Details. 2 things to note here. The first is that the VM will require 270GB of disk space if thick provisioned. In my own lab I thin provision everything to save on space. The second thing to note is that the default configuration is for a HP MSL2024 tape library. I have had difficulties getting Windows 2012 to recognise this type of library natively and attempting to install drivers for it in a VM has proved very problematic. I’ll be changing the library configuration to a Dell PowerVault model later in the deployment.
Click next and give the appliance a name. This is the inventory name as it will appear in the vsphere client. Later I’ll change the appliance’s internal host name to match.
Click Next and choose a datastore. Note that in my cased I get a disk space warning. I’ll get over this problem by thin provisioning.

Click Next and choose your disk format:

Click Next and change the network mapping, if necessary. This should be a network that you use for iSCSI traffic. For the purposes of this lab environment I mix all networking types on a single network.

Click Next and review your settings. Check the box to power on after deployment and click Finish.

Once the appliance has fully powered up you will want to change a few settings, such as the IP address and host name. Since I have had some issues getting the standard vi commands to work in a vSphere Client console, I’m going to use putty instead. But first I need to find out what IP address has been assigned to my appliance by DHCP. Use the vSphere console to log in to the appliance (username = root, password = mhvtl)and run “ifconfig eth0”.

Here we can see that my DHCP server has leased 10.0.0.101 to the appliance. Now use Putty to open an SSH session on the appliance.

Since this is the first time I’ve opened an SSH session on this particular appliance, I get a warning that this host may not be the one I think it is. I think I can trust it so I’m going to click Yes to add the servers host key to my cache.

Type “vi /etc/network/interfaces” to change the appliance from using DHCP to using a static IP address.
Comment out the line “iface eth0 inet dhcp” with a leading #. This will disable dhcp.
Remove the # signs from the start of the lines that define the statis IP address settings as shown. Save your settings by hitting Esc followed by wq (enter). If you make a mistake and want to exit without saving, just hit Esc followed by q! (enter).

Now we’ll change the host name. This is important as it avoids error messages from appearing when changing VTL settings later. The hostname must be changed in 2 files. First, type “vi /etc/hosts” and hit enter. Create an entry in the hosts file that specifies “mhvtl” as the host name (in this case 10.0.0.26 mhvtl.local.lan mhvtl). Again, hit Esc followed by wq (enter) to save your work.
Now type “vi /etc/hostname” and enter the correct hostname, saving the work as before.
Finally, enter “reboot” to restart the mhVTL appliance with the new settings.
When the appliance has restarted, you can log in again using Putty and use the ifconfig and uname commands to verify your changes:

Now let’s configure the tape library. mhVTL has a nice simple GUI that we can use to make all our changes. Open a browser and point it either to the IP address we have just given to the appliance or, better yet, to the FQDN that we should have created on our DNS server:
The default password is mhvtl.

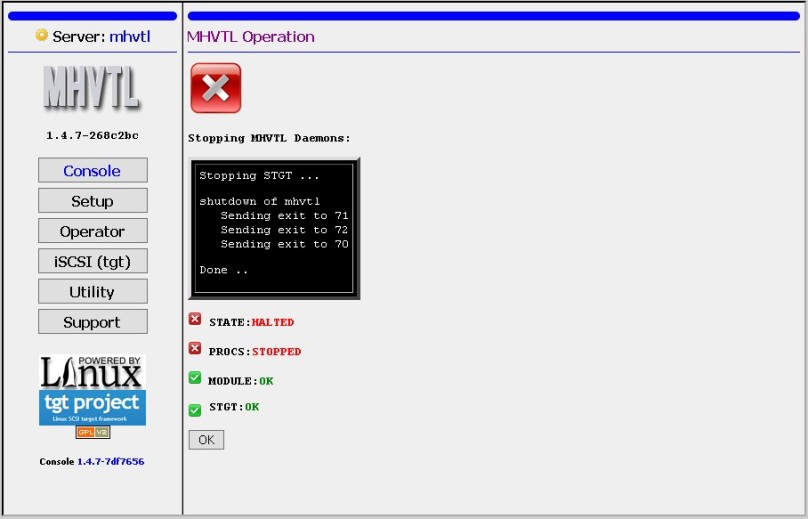
The console shows us that the mhVTL and iSCSI target daemons are running and that the appliance is configured as a 2-drive HP MSL G3 Series library. We’re going to have to change this so first stop mhVTL by clicking on the red Stop icon.

Click Yes to confirm.

The GUI will confirm that the MHVTL daemons have stopped.
Now we’ll change the tape library emulation. Note that you cannot delete the existing library until after the new one has been added. Click Setup and then click Add.

Choose the Standard configuration type:

Click Next to launch the wizard:

Select Dell from the list of brands:

Next we will change the library settings as needed. You could leave the defaults. In my case I have reduced the number of drives to 2 and the number of maps to 2. When you have made your changes click Submit Query:
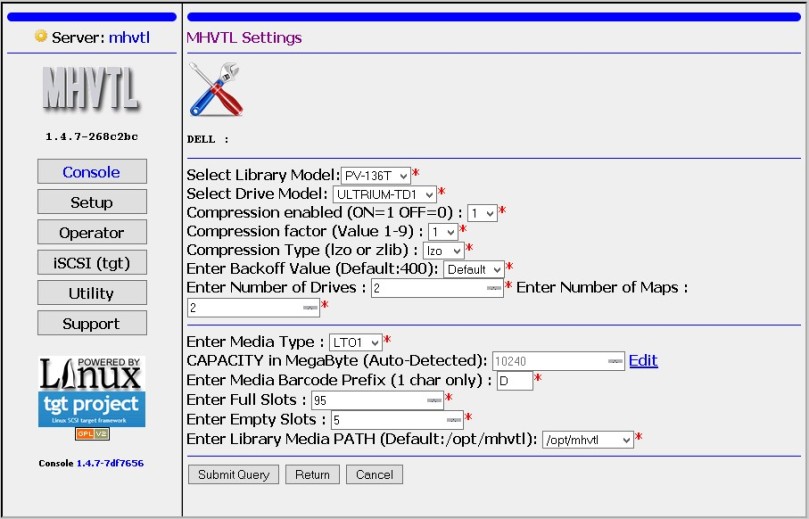
Here we can see that the library and drives have been configured as specified. Scroll to the bottom of this screen.

Click Finish.

On the next screen we are given the option to restart the mhvtl daemons. In our case we have already stopped the daemons and will not start them again until we have removed the HP MSL G3 Series library, so we will simply click Finish:

Now we return to the Setup screen and click Remove in order to delete the HP tape library. Select the library from the drop down list and also choose Yes to remove all of its tape media. Click Continue:

Confirm that you really do want to do this by clicking Continue:

The system will confirm that the library and all its media have been deleted. As this is the last change, we can click “Start MHVTL” to start the daemons:

Returning to the console we can see that the configuration changes have been successful:

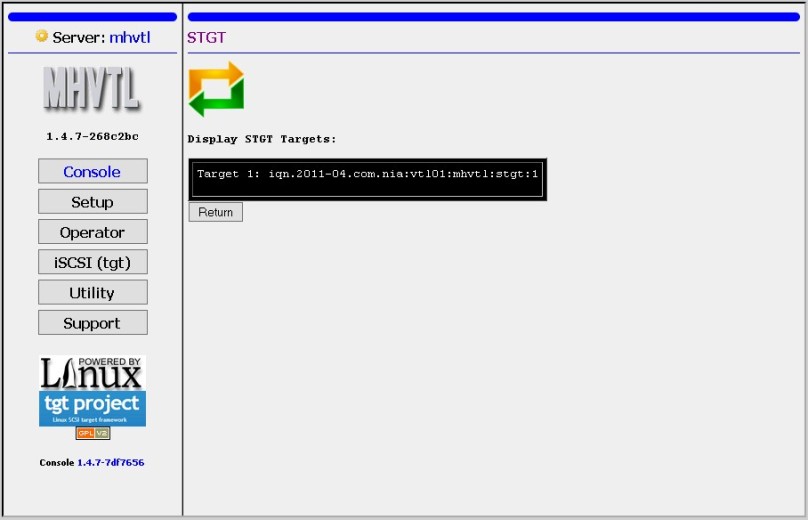
Finally, we will want to check that the iSCSI target configuration is OK. Go to the iSCSI (tgt) section:

Click on Targets and verify that a target exists. If not, you may need to click on New to create one (I have had to do this on occasion):
So that’s the mhVTL appliance fully configured and ready to go.
Note: If you are using mhVTL with Veeam v9, you will need to update your mhVTL appliance at this stage, otherwise you will run into problems when trying to backup to tape. I’ve prepared a run-through of the procedure here. For Veeam v8 you can skip the update procedure.
Now we need to go to our backup server and connect it to the library. In this case I’m running Veeam v8 on a Windows 2012 Standard server. Launch Server Manager and go to Tools->iSCSI Initiator.

When the iSCSI Initiator configuration tool launches, enter the IP address (or DNS name) of the mhVTL appliance and click Quick Connect:
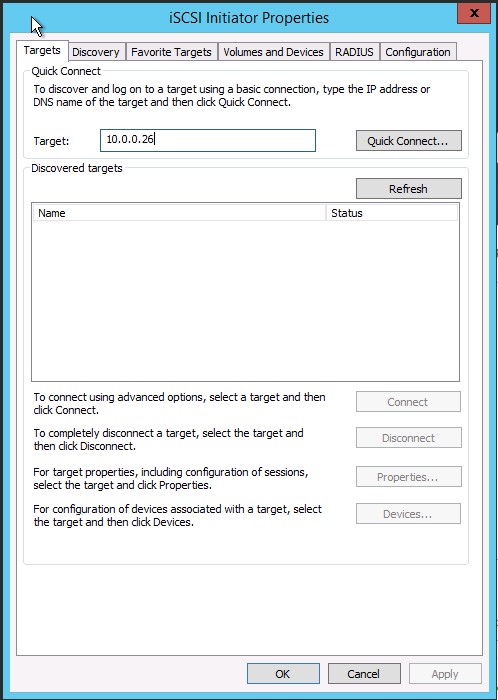
All going well, you should see this and you’re done:

If you see this, you may have a problem. But don’t worry – often a reboot of the mhVTL appliance (using the linux “reboot” command, of course) and a retry of the Quick Connect will get you back on course:

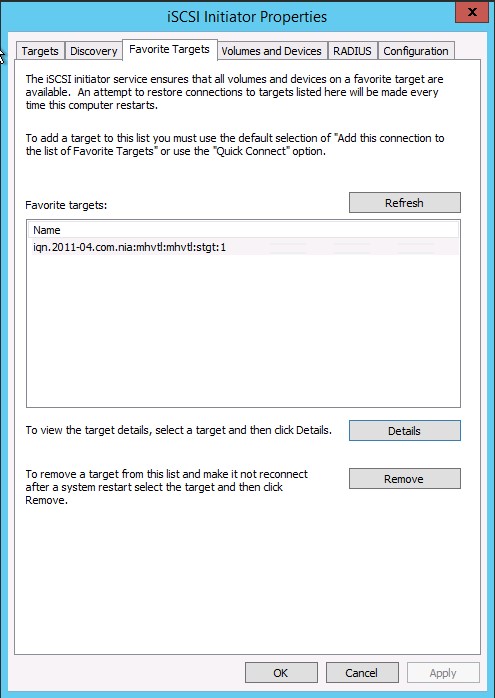
You can now check the Targets, Discovery and Favorite Targets tabs of the iSCSI Initiator Properties to check that the correct entries for the mhVTL appliance appear in each.


Now, go to the Device manager in Windows and you should see the Dell PV136T autoloader and 2 IBM Ultrium tape drives listed:

Going to my Veeam console, I run the wizard to add tape infrastructure and then I can now see the devices listed under the Tape Infrastructure section as expected.

We’re ready to start configuring tape jobs in Veeam now. In a later post I’ll show how how that’s done.
